
Picture this: you take a bite of a perfectly shaped rice ball, and a burst of savory tuna goodness fills your mouth. That’s the magic of Tuna Onigiri, a delightful Japanese snack that effortlessly combines simplicity and flavor. It’s not just any snack; it’s quick to make, versatile, and a wonderful way to use leftovers. The satisfying combination of sticky rice with a rich tuna filling hits all the right notes. Let’s dive into making these delightful rice balls!
Why You’ll Love This Recipe
This recipe is a standout for several reasons.
- Quick preparation that fits a busy schedule.
- Customizable with different fillings and seasonings.
- Great for lunchboxes or quick snacks on the go.
- Light and satisfying, perfect for any time of day.
- Fun to make with kids, sparking creativity in the kitchen!
My Experience Making This Recipe
The first time I made Tuna Onigiri, I was taken back to Japan, smelling the ocean breeze and tasting the freshest sushi. Each rice ball turned out to be a delightful surprise at family gatherings, with everyone vying for seconds.
What amazed me most was how something so simple could bring such joy. The kids loved shaping their own creations, and I enjoyed experimenting with different fillings, keeping things exciting each time I made them!
Recipe Overview
- Recipe Name: Tuna Onigiri
- Servings: 4
- Prep Time: 10 minutes
- Cook Time: 20 minutes
- Total Time: 30 minutes
- Course: Snack
- Cuisine: Japanese
- Calories per Serving: 250
Equipment You Will Need
- Rice cooker or pot
- Mixing bowl
- Plastic wrap
- Sharp knife
- Small bowl for water
Ingredients for Tuna Onigiri
- 1 cup short-grain rice
- 1 1/4 cups water
- 1 can (5 oz) tuna, drained
- 2 tablespoons mayonnaise
- 1 tablespoon soy sauce
- 1 teaspoon sesame oil
- Salt, to taste
- 4 sheets nori, cut into quarters (optional)
Ingredient Notes and Substitutions
- Short-grain rice — Creates the perfect sticky texture. Substitute with jasmine rice for a different flavor profile.
- Tuna — Provides a rich protein base. Use canned salmon or chicken as an alternative.
- Mayonnaise — Adds creaminess and flavor. Vegan mayo works well too.
- Soy sauce — Enhances the umami flavor. Tamari is a gluten-free substitute.
- Nori — Adds flavor and a fun crunch. Leave it out for an easy-to-eat snack.
How to Make Tuna Onigiri
Step 1: Rinse the Rice
Start by rinsing the rice under cold water until the water runs clear. This step removes extra starch for better texture.
Step 2: Cook the Rice
Add the rinsed rice and water into a rice cooker or pot. Cooking it properly ensures fluffy and sticky rice, which is essential for onigiri.
Step 3: Prepare the Tuna Filling
While the rice cooks, mix together the tuna, mayonnaise, soy sauce, and sesame oil in a bowl. This flavorful filling brings richness to each bite.
Step 4: Fluff the Rice
Once the rice is cooked, let it sit for about 10 minutes to steam. Fluffing the rice helps cool it slightly for easier handling.
Step 5: Season the Rice
Lightly season the rice with salt to taste. This addition enhances the flavor, ensuring every mouthful is delicious.
Step 6: Shape the Onigiri
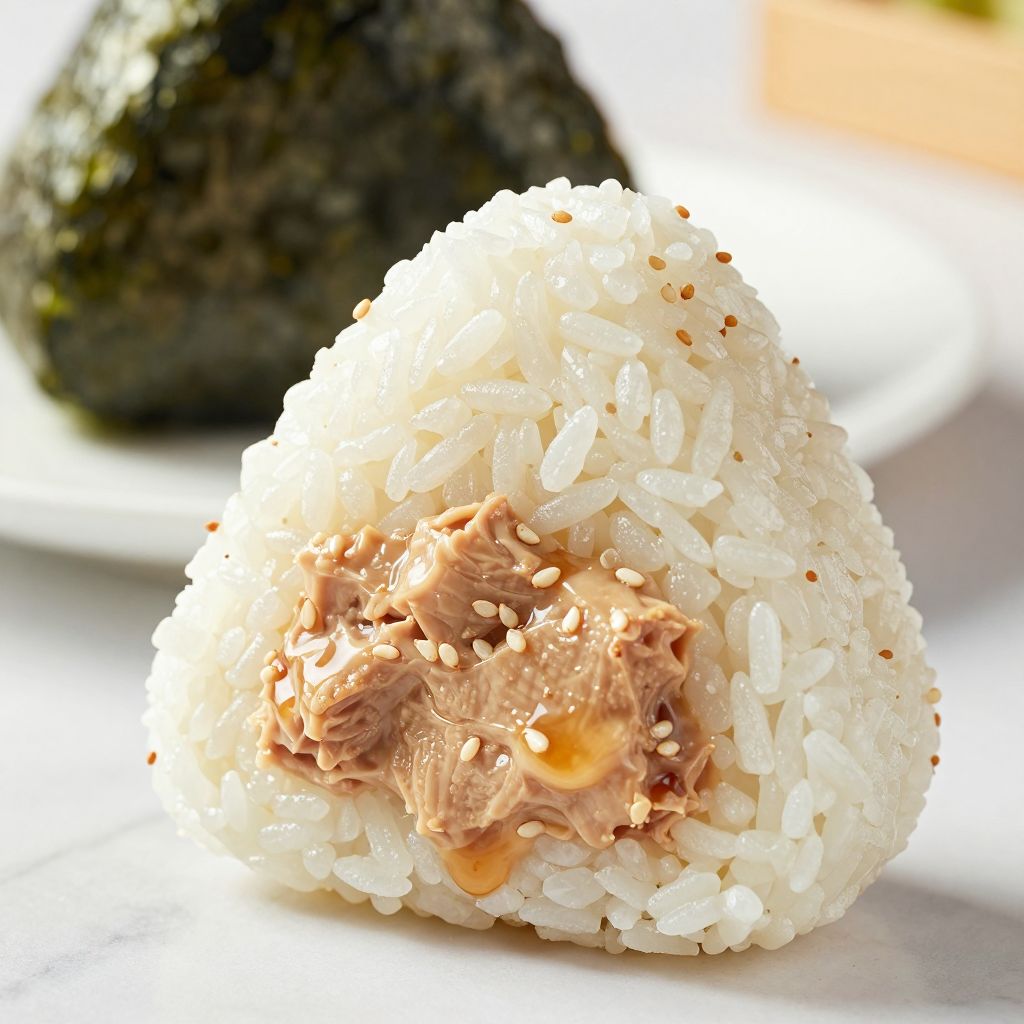
Wet your hands with water to prevent sticking, then take a handful of rice and flatten it slightly. Place a spoonful of the tuna mixture in the center.
Step 7: Form the Rice Balls
Fold the rice over the filling, encasing it completely. Gently shape it into a triangle or ball, caring not to press too hard.
Step 8: Wrap in Nori
If using, wrap a piece of nori around your onigiri. This adds flavor and makes them easier to hold.
Pro Tip: Make sure your hands are wet when shaping the onigiri to prevent the rice from sticking!
Tips for the Best Tuna Onigiri
- Use fresh, short-grain rice for the best texture.
- Don’t over-season; let the natural flavors shine.
- Experiment with fillings beyond tuna, like teriyaki chicken.
- Ensure your tuna is well-drained to avoid sogginess.
- Serve chilled or at room temperature for optimal taste.
Common Mistakes to Avoid
- Using long-grain rice — You won’t get the desired stickiness.
- Skipping the rinsing step — This makes the rice gummy and dense.
- Overfilling — Too much filling causes messiness and breaks the rice.
- Packing too tightly — Compressing the rice can lead to a hard texture.
Serving Suggestions
Tuna onigiri makes a wonderful standalone snack, but you can elevate your serving with a few pairings.
- Ppickled vegetables for a tangy contrast.
- A side of miso soup for warmth.
- Fresh edamame for a protein punch.
- Sliced cucumbers for a refreshing crunch.
Variations to Try
- Add diced avocado to the filling for creaminess.
- Mix in chopped scallions for added freshness.
- Incorporate spicy mayo for a kick.
- Try a vegetarian filling with grilled vegetables.
Dietary Adaptations
- Gluten-free: Use tamari instead of soy sauce.
- Dairy-free: Stick with traditional mayo or vegan substitutes.
- Vegan: Opt for chickpea salad as an alternative filling.
- Low-carb: Use cauliflower rice instead of traditional rice.
Storage and Reheating
Refrigerator
Tuna onigiri can be stored in an airtight container in the fridge for up to 2 days.
- Wrap each rice ball in plastic wrap.
- Keep chilled until ready to eat.
Freezer
For longer storage, place them in a freezer-safe bag for up to a month.
- Defrost in the fridge before consuming.
- Avoid freezing with nori to keep it crisp.
Reheating
Reheat onigiri in a microwave for about 30 seconds.
- Cover with a damp paper towel to keep rice moist.
- Enjoy cold for a refreshing snack!
Nutrition Information
| Nutrient | Amount |
|---|---|
| Calories | 250 |
| Total Fat | 10g |
| Saturated Fat | 1g |
| Carbohydrates | 32g |
| Fiber | 1g |
| Sugar | 1g |
| Protein | 10g |
| Sodium | 300mg |
| Cholesterol | 20mg |
This nutritional information is estimate and may vary based on the specific ingredients used.
Frequently Asked Questions
Can I make these onigiri ahead of time?
Yes, you can prepare them a day in advance and store them in the refrigerator.
What can I substitute for tuna?
You can use shredded chicken, crab meat, or even a vegetarian option like avocado or tofu.
How should I handle leftover onigiri?
Store leftovers in an airtight container in the refrigerator for up to 2 days.
Why did my onigiri fall apart?
If they are too dry or not packed tightly enough, they may lose shape while handling.
Do I have to use nori?
Nori is optional, but it adds a nice flavor and makes them easier to hold.
Final Thoughts
Making Tuna Onigiri is a delightful experience that brings a piece of Japanese culture into your kitchen. With so many varieties and quick prep time, you’ll want to keep this recipe in your rotation.
Try these rice balls at your next gathering or simply as a quick snack. Enjoy the burst of flavors, and don’t forget to explore more wonderful recipes like the Subway Tuna Recipe or a delicious Healthy Tuna Salad Recipe!
Tuna Onigiri
Ingredients
Equipment
Method
- Rinse the short-grain rice under cold water until the water runs clear, about 2 minutes.
- Combine the rinsed rice and 1 1/4 cups water in a rice cooker or pot and cook for 20 minutes, or until the water is fully absorbed.
- While the rice cooks, mix the drained tuna, mayonnaise, soy sauce, and sesame oil in a mixing bowl until well combined.
- Once the rice finishes cooking, let it steam in the closed cooker or pot for 10 minutes.
- Transfer the rice to a bowl, season lightly with salt, and fluff gently with a spatula.
- Wet your hands in a small bowl of water, then take about 1/2 cup of rice and flatten it slightly in your palm.
- Place a spoonful of the tuna mixture in the center of the rice, then fold and shape into a firm triangle or ball, about 2 inches across.
- Wrap each onigiri with a quarter sheet of nori, if using, and trim any excess with a sharp knife.