
The first bite of a homemade peanut butter cup is like stepping into a moment of bliss. These delightful treats marry creamy peanut butter with velvety chocolate, creating a texture and flavor harmony that’s hard to resist.
Why You’ll Love This Recipe
Making your own peanut butter cups is not just rewarding; it’s also incredibly satisfying. Here’s why this recipe stands out:
- Simple ingredients you likely have on hand.
- Customizable to your taste preferences.
- Makes a great gift or a delightful treat for yourself.
- No baking required—just melt, mix, and chill!
- Perfect for any occasion or simply to satisfy your sweet tooth.
My Experience Making This Recipe
I remember the first time I attempted this recipe; my kitchen quickly filled with the rich aroma of melting chocolate and peanut butter. My family gathered, eagerly anticipating these homemade gems.
When I finally revealed the peanut butter cups, the looks on their faces were priceless. The combination of flavors was an instant hit, and they vanished faster than I could keep track!
Recipe Overview
- Recipe Name: Peanut Butter Cups
- Servings: 12 cups
- Prep Time: 15 minutes
- Cook Time: 10 minutes
- Total Time: 25 minutes
- Course: Dessert
- Cuisine: American
- Calories per Serving: 150
Equipment You Will Need
- Microwave-safe bowl
- Silicon muffin cups or cupcake liners
- Mixing spoon
- Refrigerator
Ingredients for Peanut Butter Cups
- 1 cup semi-sweet chocolate chips
- 1/2 cup creamy peanut butter
- 1/4 cup powdered sugar
- 1/4 cup milk chocolate chips (optional, for drizzling)
Ingredient Notes and Substitutions
- Semi-sweet chocolate chips: Provide a rich flavor. Substitute with dark chocolate for a richer taste or white chocolate for a lighter option.
- Creamy peanut butter: Offers a smooth filling. Use crunchy peanut butter for added texture or almond butter for a nutty twist.
- Powdered sugar: Adds sweetness and helps with consistency. Substitute with maple syrup for a natural sweetener.
- Milk chocolate chips: For drizzling on top. Skip if you prefer pure chocolate or go for dark chocolate for contrast.
How to Make Peanut Butter Cups
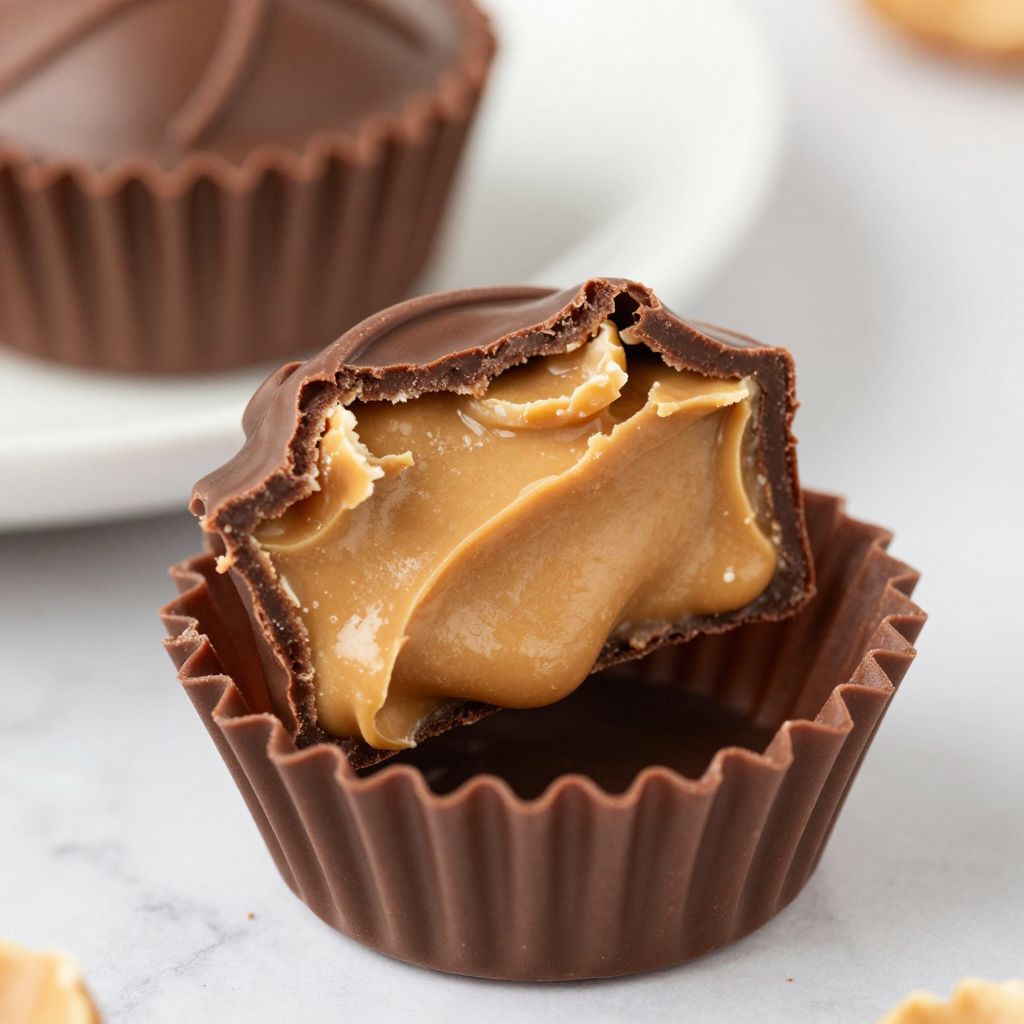
Step 1: Melt the Chocolate
In a microwave-safe bowl, heat the semi-sweet chocolate chips in 30-second increments, stirring in between. This prevents scorching and ensures a smooth melt.
Step 2: Prepare the Cups
Line a muffin tin with silicon cups or cupcake liners. This makes removing your cups easy and keeps things tidy.
Step 3: Add the First Layer of Chocolate
Pour a spoonful of the melted chocolate into each cup, using enough to cover the bottom. This creates the base layer that will hold everything together.
Step 4: Chill the Chocolate
Place the muffin tin in the refrigerator for about 10 minutes. Chilling ensures the chocolate hardens properly before the next layer.
Step 5: Make the Peanut Butter Filling
In a bowl, mix the creamy peanut butter with the powdered sugar until smooth. This mixture will be the delicious filling of your cups.
Step 6: Fill with Peanut Butter
Once the chocolate has hardened, add a spoonful of the peanut butter mixture on top of each chocolate base. Flatten it slightly to ensure it gets fully covered.
Step 7: Add the Final Chocolate Layer
Pour more melted chocolate over the peanut butter filling, ensuring it covers the filling completely. This forms the top layer and holds everything together.
Step 8: Chill Again
Return the muffin tin to the refrigerator to set for an additional 15 minutes. This final chill solidifies the peanut butter cups into perfect treats.
Pro Tip: For a perfectly smooth finish, ensure each layer is well-chilled before adding the next.
Tips for the Best Peanut Butter Cups
- Use high-quality chocolate for the best flavor.
- Make sure to measure the peanut butter accurately for consistency.
- Experiment with different fillings like caramel or marshmallow for a fun twist.
- Let the cups sit at room temperature for a few minutes before serving to enhance flavor.
- Try adding a sprinkle of sea salt on top for a gourmet touch.
Common Mistakes to Avoid
- Not melting the chocolate properly, which can cause it to scorch.
- Poorly chopped chocolate, leading to uneven melting.
- Skipping the chill time, which could result in messy layers.
- Using low-quality peanut butter, affecting both texture and taste.
Serving Suggestions
Peanut butter cups are delightful on their own, but they pair well with a few extras. Here are some tasty suggestions:
- Serve with a glass of cold milk for classic enjoyment.
- Pair them with fresh fruit like strawberries for a refreshing balance.
- Enjoy alongside a scoop of vanilla ice cream for a decadent dessert.
- Crushed over pancakes or waffles for an indulgent breakfast.
Variations to Try
- Add chopped nuts to the peanut butter for added crunch.
- Mix in mini candy pieces into the chocolate before setting.
- Use flavored chocolates, such as peppermint or orange, for a unique twist.
- Make a dark chocolate version for a richer dessert experience.
Dietary Adaptations
- Gluten-free: Use gluten-free chocolate chips. Most brands are safe, just check labels.
- Dairy-free: Swap chocolate for dairy-free options; many good brands exist now.
- Vegan: Choose vegan chocolate chips and natural nut butter without additives.
- Low-carb/Keto: Use sugar-free chocolate and an alternative sweetener like erythritol.
Storage and Reheating
Refrigerator
Store your peanut butter cups in an airtight container in the refrigerator to keep them fresh.
- Consume within 2 weeks.
- They should be placed in a cool area to prevent melting.
Freezer
For longer storage, freeze the cups in an airtight container.
- They can last up to 3 months.
- Thaw in the refrigerator before serving to maintain texture.
Reheating
Reheat gently in the microwave for a few seconds if you enjoy them warm.
- Check frequently to prevent melting too much of the chocolate.
- Warm chocolate can enhance the flavors and softness.
Nutrition Information
| Nutrient | Amount |
|---|---|
| Calories | 150 |
| Total Fat | 10g |
| Saturated Fat | 3g |
| Carbohydrates | 15g |
| Fiber | 1g |
| Sugar | 10g |
| Protein | 3g |
| Sodium | 50mg |
| Cholesterol | 0mg |
Nutrition values are approximate and may vary based on ingredients used.
Frequently Asked Questions
Can I use crunchy peanut butter?
Absolutely! Crunchy peanut butter adds a delightful texture to your cups.
Can I make these in advance?
Yes, peanut butter cups store well, making them perfect to prepare ahead of time.
How should I store leftover cups?
Keep them in an airtight container, either in the fridge or freezer for longer storage.
What if my chocolate seized?
If chocolate seizes, try adding a teaspoon of vegetable oil to restore its consistency.
Are these gluten-free?
Yes, just check that your chocolate chips are gluten-free!
Final Thoughts
Making homemade peanut butter cups is a fun and rewarding experience that can be easily customized. The joy of sharing them—or keeping them all to yourself—is unbeatable.
Give this recipe a try; you might find it becomes a favorite in your kitchen, just as it did in mine. For more tasty ideas, check out my Peanut Butter Fudge Recipe or enjoy some Butterfinger Balls.
Peanut Butter Cups
Ingredients
Equipment
Method
- In a microwave-safe bowl, heat the semi-sweet chocolate chips in 30-second increments at high power, stirring between intervals until smooth and fully melted.
- Line a muffin tin with silicon cups or cupcake liners to prepare the molds for the chocolate base.
- Spoon about 1 tablespoon of melted chocolate into each cup, spreading evenly to form a base layer.
- Refrigerate the muffin tin for 10 minutes, or until the chocolate base is firm to the touch.
- In a medium bowl, mix the creamy peanut butter with powdered sugar until the filling is smooth and thick.
- Place about 1 tablespoon of the peanut butter mixture on each set chocolate base, flattening lightly with the back of the spoon.
- Pour the remaining melted chocolate over the peanut butter layer, ensuring the filling is completely covered.
- Refrigerate for an additional 15 minutes, or until the peanut butter cups are fully set before serving.