
There’s nothing quite like a freshly baked Knish, bursting with flavor and wrapped in tender dough. These delightful pastries, filled with a variety of hearty fillings, bring comfort and nostalgia to any meal, making them a beloved staple in many homes.
With their flaky exterior and savory filling, Knishes are versatile enough to satisfy any craving, whether you prefer potato, meat, or even spinach. Plus, they’re great for meal prep or as a snack on the go. Let’s get into how to whip up your very own batch!
Why You’ll Love This Recipe
This Knish Recipe offers a delicious mix of flavor and comfort.
- Versatile: Perfect for any filling you desire.
- Freezable: Make a big batch and enjoy any time.
- Great for gatherings: These bite-sized treats are always a hit.
- Crispy on the outside, soft on the inside: A texture you can’t resist.
- Easy to customize: Modify fillings to fit your taste.
My Experience Making This Recipe
From the first bite, the warm, flaky pastry instantly took me back to my childhood. They were a regular feature at family gatherings, and making them now brings a wave of nostalgia.
The aroma that filled my kitchen while baking reminded me why I love cooking so much. Watching friends savor each bite reminded me that food is truly meant to be shared.
Recipe Overview
- Recipe Name: Knish
- Servings: 12 Knishes
- Prep Time: 30 minutes
- Cook Time: 40 minutes
- Total Time: 1 hour 10 minutes
- Course: Snack, Appetizer
- Cuisine: Jewish
- Calories per Serving: 200
Equipment You Will Need
- Mixing bowl
- Rolling pin
- Knife or pizza cutter
- Baking sheet
- Parchment paper
- Fork (for crimping)
Ingredients for Knish
- 4 cups all-purpose flour
- 2 teaspoons salt
- 1 teaspoon baking powder
- 1 cup unsalted butter, chilled and diced
- 1 large egg
- 1/2 cup cold water
- 4 cups mashed potatoes or filling of choice
- 1 medium onion, finely chopped (if using potato filling)
- Oil for sautéing (if using onion)
Ingredient Notes and Substitutions
- All-purpose flour: The base for the dough, gives structure. You may substitute with gluten-free flour.
- Unsalted butter: Provides richness. Vegan butter works for a dairy-free option.
- Egg: Helps bind the dough. Use a flaxseed egg for a vegan substitute.
- Mashed potatoes: Classic filling choice for Knish. Sweet potatoes can create a sweeter flavor profile.
How to Make Knish
Step 1: Prepare the Dough
In a large mixing bowl, combine the flour, salt, and baking powder. This creates a solid base that holds the Knish together.
Step 2: Cut in the Butter
Add the diced butter into the flour mixture. Use a fork or pastry cutter to mix until the mixture resembles coarse crumbs.
Step 3: Add Egg and Water
Mix in the egg and gradually add cold water, stirring until the dough comes together. This moisture activates the gluten, ensuring a better texture.
Step 4: Chill the Dough
Wrap the dough in plastic wrap and chill for at least 30 minutes. This relaxes the gluten, making the dough easier to roll out.
Step 5: Preheat the Oven
While the dough chills, preheat your oven to 375°F (190°C). This ensures perfect baking from the start.
Step 6: Prepare the Filling
If using onion, sauté it in a bit of oil until golden. Whether using potatoes or other fillings, ensure they are well seasoned.
Step 7: Roll Out the Dough
Once chilled, roll out the dough on a floured surface until it is about 1/8 inch thick. A uniform thickness guarantees even baking.
Step 8: Fill and Shape the Knishes
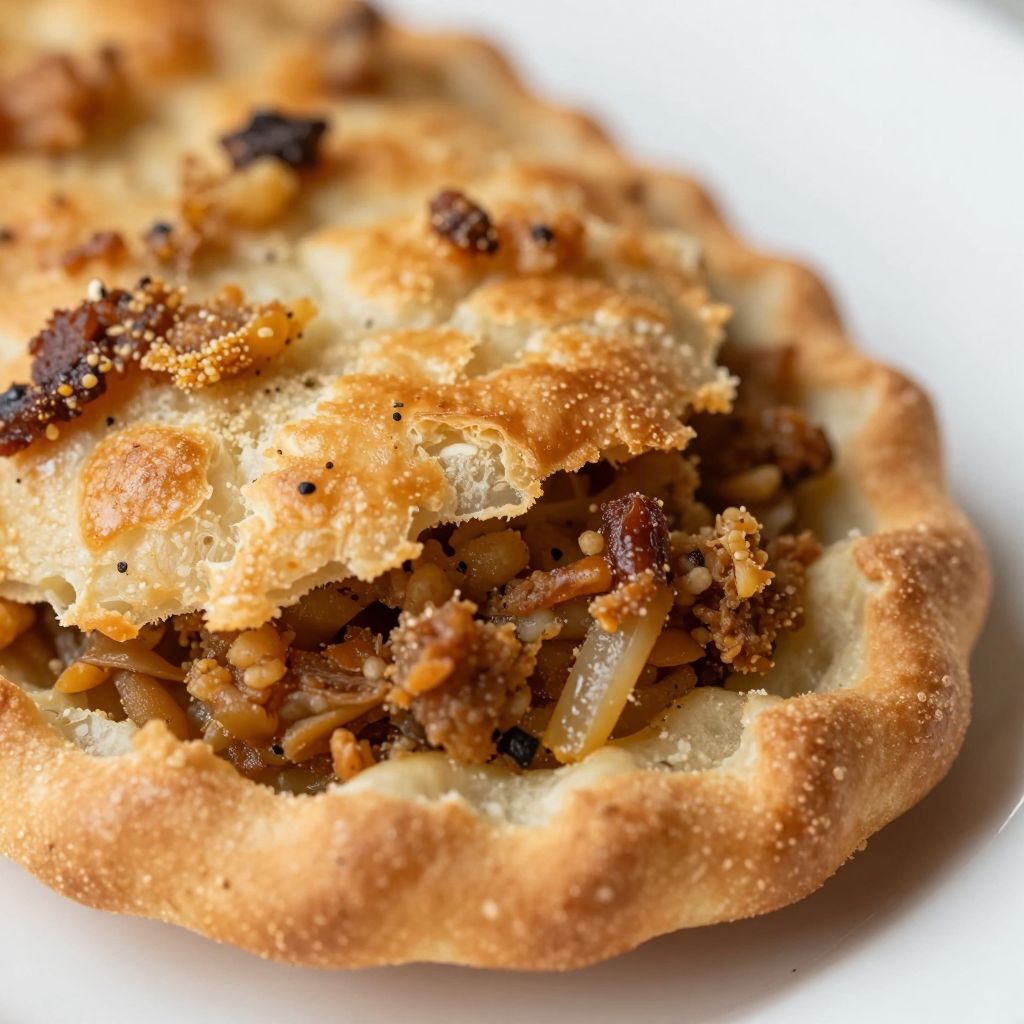
Cut dough into squares, place a spoonful of filling in the center, and fold the dough over to seal. Use a fork to crimp edges securely; this prevents filling from escaping.
Step 9: Bake
Place the Knishes on a lined baking sheet and bake for 30-35 minutes, until golden brown. The baking creates a gorgeous crust that brings everything together.
Pro Tip: Brush the tops with beaten egg before baking for a beautiful, shiny finish.
Tips for the Best Knish
- Keep your butter cold during mixing for a flaky texture.
- Don’t overwork the dough; mix until just combined.
- Let the filling cool before using to prevent soggy dough.
- Feel free to experiment with fillings for different flavor profiles.
- Use a fork to crimp edges for a more appealing look.
Common Mistakes to Avoid
- Overworking the dough – This leads to a tough texture.
- Skimping on seasoning – A bland filling can make the Knish unexciting.
- Not chilling the dough – Skipping this step affects the final flakiness.
- Baking right after filling – Allowing dough to rest prevents shrinking during baking.
Serving Suggestions
Knishes are delightful on their own but shine with simple pairings. Try these suggestions for a complete meal.
- Serve with a dollop of sour cream.
- A side of applesauce adds a sweet contrast.
- Pair with pickles for a crunchy bite.
- Add a fresh salad for a lighter option.
Variations to Try
- Try a spinach and cheese filling for a different flavor.
- Sweet potato replaces regular potatoes for a sweeter twist.
- Ground beef or turkey adds protein and richness.
- Experiment with mushroom filling for a hearty vegetarian option.
Dietary Adaptations
- Gluten-free: Use a gluten-free flour blend.
- Dairy-free: Substitute butter with a plant-based option.
- Vegetarian: Choose veggies and omit meat.
- Keto: Use almond flour for a low-carb version.
Storage and Reheating
Refrigerator
Store cooled Knishes in an airtight container in the refrigerator for up to 4 days.
- Wrap each Knish to maintain freshness.
- Reheat in an oven for best results.
Freezer
You can freeze unbaked Knishes for up to a month.
- Flash freeze individually before transferring to a container.
- Bake from frozen, adding extra baking time.
Reheating
Reheat in the oven at 350°F (175°C) for about 15 minutes until warm.
- Microwave in short intervals if you need a quicker option.
- Keep covered to prevent drying out.
Nutrition Information
| Nutrient | Amount |
|---|---|
| Calories | 200 |
| Total Fat | 10g |
| Saturated Fat | 6g |
| Carbohydrates | 24g |
| Fiber | 2g |
| Sugar | 1g |
| Protein | 4g |
| Sodium | 300mg |
| Cholesterol | 40mg |
Nutrition values may vary based on specific ingredients used.
Frequently Asked Questions
Can I substitute the filling in Knishes?
Absolutely! You can fill them with meats, vegetables, or even sweet fillings based on your preference.
Can I make Knishes ahead of time?
Yes, they can be assembled ahead and either baked or frozen for later. They freeze wonderfully!
How do I ensure the Knish stays flaky?
Keep your ingredients cold, and don’t overwork the dough to maintain flakiness.
What should I do if my dough is sticky?
If your dough is too sticky, sprinkle in a little extra flour during rolling.
What are some traditional fillings for Knishes?
Potato, meat, and spinach are classic choices that many people enjoy!
Final Thoughts
Making your own Knishes is not just about food; it’s about tradition and memories woven into every bite. I encourage you to experiment with fillings and make this recipe your own.
As you roll out the dough and watch them bake to golden perfection, you’ll appreciate how simple ingredients become something truly special. For more inspiration, check out Bible verses about cooking or Bible verses about food for a dash of culinary wisdom.
Knish
Ingredients
Equipment
Method
- In a large mixing bowl, combine the flour, salt, and baking powder.
- Add the diced butter into the flour mixture. Use a fork or pastry cutter to mix until the mixture resembles coarse crumbs.
- Mix in the egg and gradually add cold water, stirring until the dough comes together.
- Wrap the dough in plastic wrap and chill in the refrigerator for at least 30 minutes.
- Preheat your oven to 375°F (190°C) while the dough chills.
- If using onion, sauté it in a bit of oil until golden.
- Once chilled, roll out the dough on a floured surface until about 1/8 inch thick.
- Cut the dough into squares, place a spoonful of filling in the center, and fold the dough over to seal.
- Use a fork to crimp edges securely to prevent filling from escaping.
- Place the shaped knishes on a lined baking sheet and bake for 30-35 minutes until golden brown.